

The Memory Behind This Treat
I started making these Keto Cheesy Garlic Breadsticks on a night when my blood sugar had been fussy all day and all I really wanted was a giant basket of restaurant garlic bread. You know the kind: warm, buttery, and absolutely no help to your glucose monitor. I stood in my Asheville kitchen, staring at a bag of shredded mozzarella and a lonely egg, wondering if I could fake the comfort without the carbs. That first tray wasn’t pretty—I pressed the “dough” too thin, burned the edges a bit, and my daughter still tore into it like it was the best thing she’d ever dipped in marinara. We laughed, picked off the crispy cheese bits, and I thought, “Okay. There’s something here.”
These breadsticks quickly became our compromise food: all the cozy garlic-bread energy, none of the post-dinner carb crash. I started making them alongside low-carb soups, salads, and my Sunday “pizza night” casseroles, and they turned into the thing everyone grabbed first from the table. My mom, who also watches her sugars, loved that she could enjoy that warm, stretchy cheese without worrying about her readings later. Over time, I realized these Keto Cheesy Garlic Breadsticks weren’t just a recipe; they were a little bridge back to the Italian-style comfort foods I thought I’d given up for good. Now, whenever one of my readers tells me they served these instead of traditional breadsticks and nobody missed the bread, I think of that first imperfect batch—and how a craving turned into a keeper.
How To Make It (Mix & Ingredients)
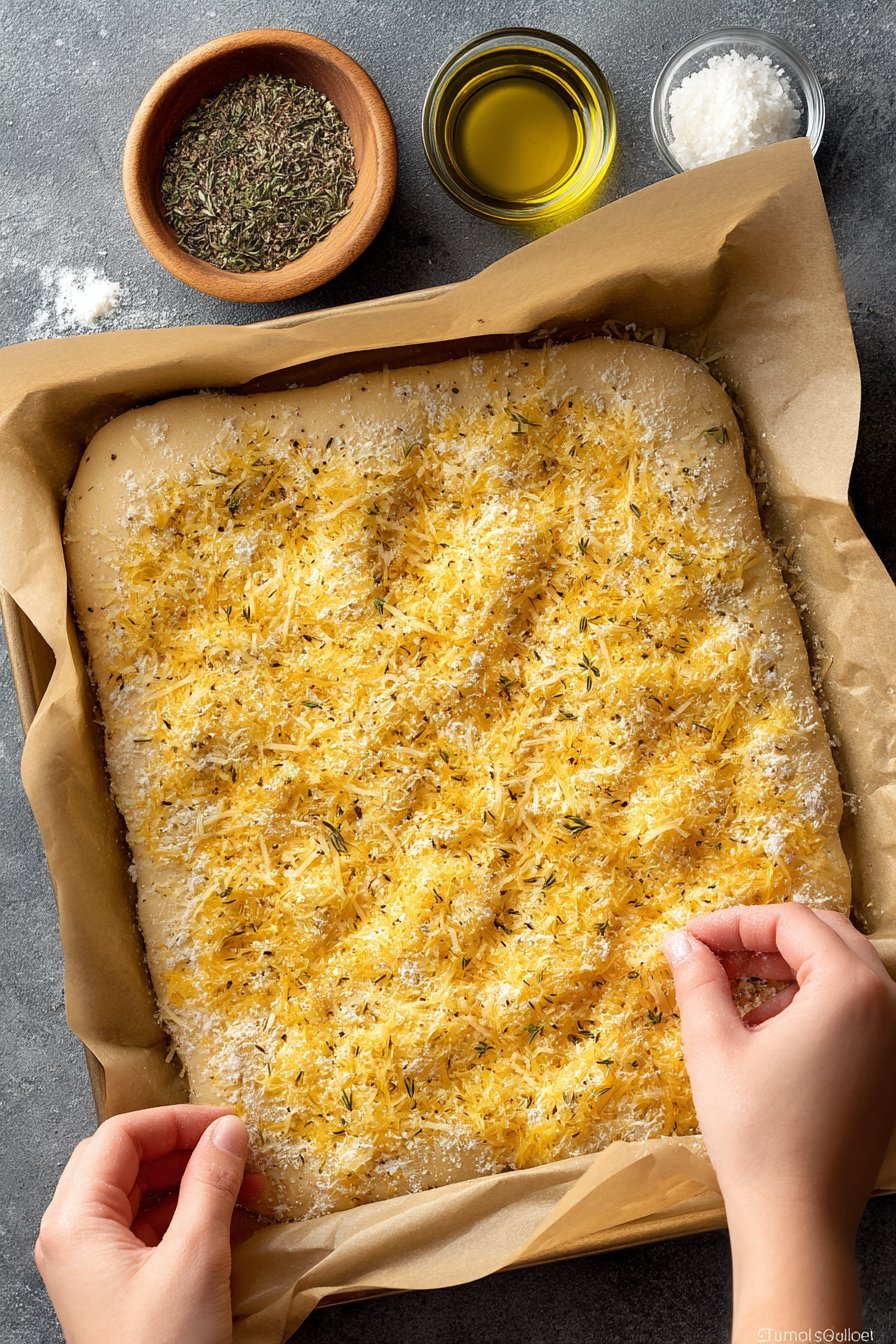
To make these Keto Cheesy Garlic Breadsticks, you only need 4 main ingredients and 1 bowl. Start by preheating your oven to 350°F and lining a baking sheet with parchment paper; this keeps the cheesy base from sticking and makes cleanup blissfully easy. In a medium mixing bowl, add your shredded mozzarella, parmesan, egg, and garlic powder. I like to use pre-shredded cheese for convenience, but if you grate it fresh, it melts a little smoother and gives you that extra stretchy, pizzeria-style bite. Mix everything together with a fork or your hands until it turns into a thick, sticky, unified mass—no dry cheese pockets hiding at the bottom of the bowl.
Instructions Process of Keto Cheesy Garlic Breadsticks
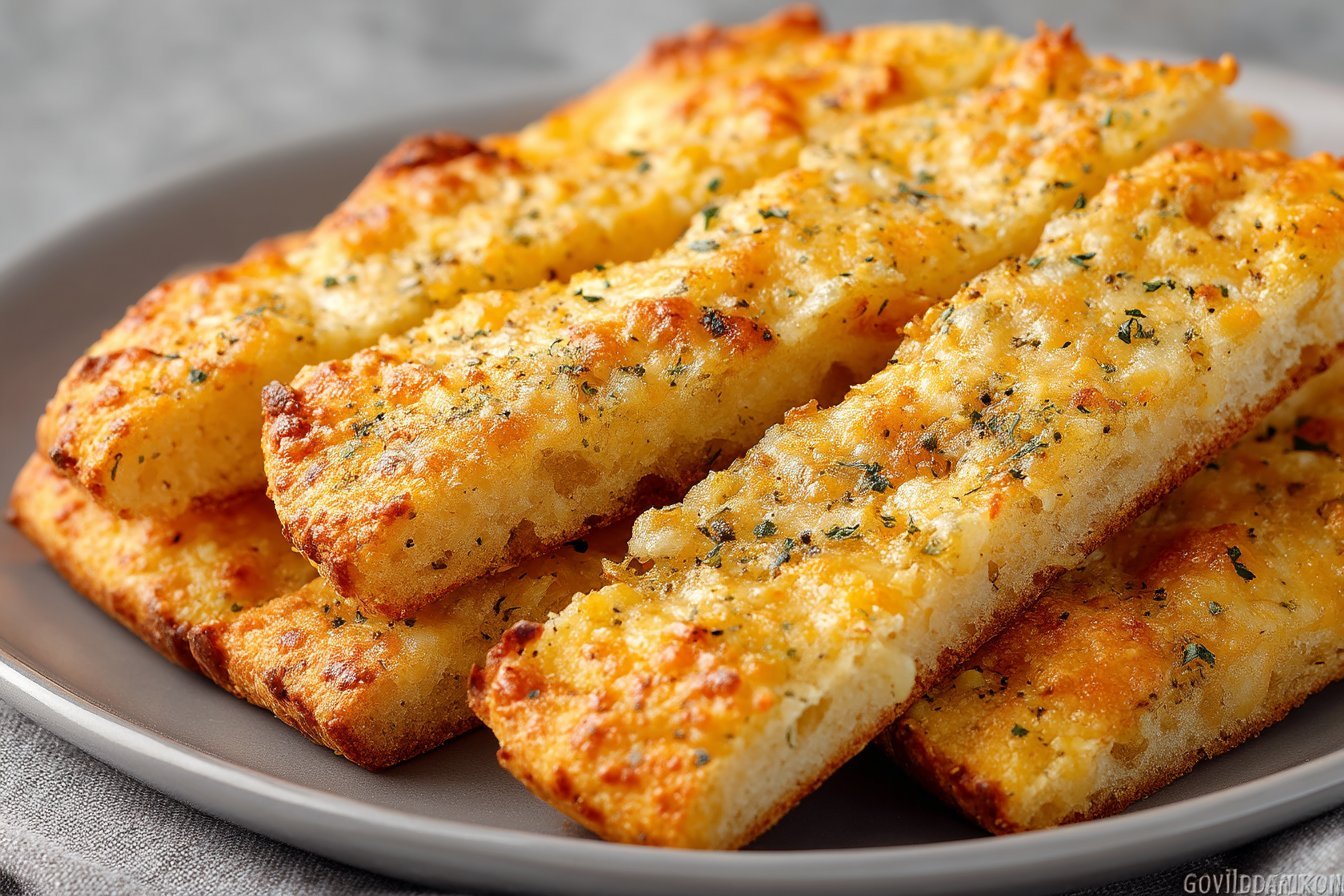
Once your Keto Cheesy Garlic Breadsticks “dough” is mixed, scoop it onto the parchment-lined pan and press it into a thin, even rectangle, about 1/4-inch thick. If it sticks to your fingers, lightly oil your hands or use a silicone spatula; don’t worry, it will firm up beautifully in the oven. Bake until it looks set and lightly golden, then switch to broil to get that bubbly, toasty cheese top—this is where the flavor really deepens without adding any carbs. After a short cooling time, slice into strips with a pizza cutter and shower them with parsley, Italian seasoning, or red pepper flakes. If you love dipping, serve with a low-sugar marinara or pizza sauce, similar to what you might use for other keto appetizers like cheese chips or mini fathead pizzas, and enjoy how something so simple can feel like a full-on restaurant treat.
Make-Ahead & Storage
Keto Cheesy Garlic Breadsticks are very make-ahead friendly, which is a lifesaver on busy nights. You can mix and shape the cheesy “dough” up to 1 day in advance, then cover the baking sheet tightly and keep it in the fridge until you’re ready to bake. If you like to plan even further ahead, bake the breadsticks completely, let them cool, slice them, and then store them for later. I do this on Sundays so I have an easy low-carb snack ready to grab when the late-afternoon munchies hit. Just remember: because they’re mostly cheese and egg, they need to stay chilled when you’re not actively eating or reheating them.
Store leftover Keto Cheesy Garlic Breadsticks in an airtight container in the refrigerator for up to 4 days. Layer the strips with parchment paper between them so they don’t fuse into one big cheesy slab. To reheat, skip the microwave if you can, because it makes them soft and a bit rubbery; use the oven, toaster oven, or air fryer at 325–350°F for 4–7 minutes, just until warm and lightly crisp on the edges again. You can also freeze them: place cooled slices in a single layer on a baking sheet, freeze until solid, then transfer to a freezer bag and keep for up to 2 months. Reheat from frozen in a 350°F oven or air fryer until hot and sizzling—perfect for a quick side with keto pizza night or a speedy comfort snack.
Best Ingredients & Party Variations
For the best Keto Cheesy Garlic Breadsticks, start with low-moisture, part-skim mozzarella so they bake up firm and sliceable instead of greasy and floppy. Freshly shredded cheese melts better than the pre-bagged stuff, which often has starch added (and hidden carbs). Parmesan can be either shredded or grated, but if you use grated, reduce the amount so the “dough” doesn’t dry out and crumble. I also recommend a room-temperature egg so it blends more easily into the cheese mixture and gives a nice, even texture. Garlic powder works better than fresh garlic here because it distributes flavor evenly and won’t burn under the broiler.
Once you’ve nailed the base, these Keto Cheesy Garlic Breadsticks are a blank canvas for every party you host. For a “pizza night” board, sprinkle the top with mini pepperoni or chopped olives halfway through baking, then serve with warm low-sugar marinara and a quick keto ranch dip. For a spicier version, add red pepper flakes and a pinch of smoked paprika to the mix, then finish with a drizzle of garlic-infused olive oil after broiling. You can also go herb-forward and mix in dried Italian seasoning or oregano, then garnish with fresh parsley or basil for color; it looks beautiful on a game-day platter. If you’re serving a mixed crowd (keto and non-keto eaters), slice the “bread” thinner and offer it alongside regular breadsticks—most folks reach for the cheesy ones first and never notice they’re low-carb.

Serving of Keto Cheesy Garlic Breadsticks
Conclusion
If you’re anything like me, these simple little cheesy garlic “breadsticks” will quickly become one of those recipes you lean on when you want comfort without the carb crash. There’s something so cozy about pulling a pan of bubbling, golden cheese out of the oven and watching everyone hover around the kitchen, waiting for that first pull-apart piece. It feels a little like being back in my grandmother’s kitchen—hands reaching in, laughter overlapping, no one asking if it’s keto or not, just happy to be together and well-fed.
I love that a recipe this easy can still create such special moments. Maybe it’s a Friday night “snack dinner,” maybe it’s game day, or maybe it’s just you, a quiet evening, and a plate full of warm, garlicky goodness. Either way, you’re allowed to enjoy it, fully and guilt-free. Go ahead and give these Keto Cheesy Garlic Breadsticks a try—you might be surprised how quickly they become a family tradition.
For more delicious recipes like this, follow us on social media!
Are Keto Cheesy Garlic Breadsticks really low in carbs and good for keto or diabetes?
Yes, these Keto Cheesy Garlic Breadsticks are truly low in carbs because they skip flour, grains, and starches completely. The base comes from mozzarella, parmesan, egg, and garlic powder, which are all naturally low in carbs and higher in fat and protein. For blood sugar control, the big win is that there’s **no wheat flour or hidden sugar** to spike glucose. If you track macros, you’ll want to account mainly for the small amount of carbs in the cheeses and any dipping sauce. Choose a no-sugar-added marinara or just melted garlic butter if you’re extra careful with carbs. Always adjust portion sizes to match your personal carb goals for the day.
Can I customize the cheese and seasonings in these breadsticks?
You can absolutely play with the cheeses, as long as they melt nicely. Mozzarella gives you that stretchy, ‘bready’ feel, while parmesan adds salty, nutty flavor—sharp cheddar or provolone also work well in small amounts. I suggest keeping at least half mozzarella so the breadsticks hold together and bake evenly. For seasonings, Italian seasoning, crushed red pepper, or dried parsley all add great flavor without adding carbs. Just avoid blends with added sugar or starch—read those labels. A sprinkle of extra garlic powder or onion powder goes a long way for “pizzeria” flavor without the pizza crust.
What’s the best way to store, reheat, and freeze Keto Cheesy Garlic Breadsticks?
Let the breadsticks cool completely, then store them in an airtight container in the refrigerator for up to 3 days. For the best texture, reheat them in a 350°F oven or toaster oven for 5–7 minutes, instead of the microwave, which can make them rubbery. If you’d like to freeze them, arrange the baked and cooled breadsticks in a single layer on a sheet pan, freeze until firm, then transfer to a freezer bag. They keep well for about 1 month. Reheat from frozen at 350°F until hot and re-crisped, usually 8–10 minutes. This makes them a handy grab-and-bake keto snack or side.
Recipe
Keto Cheesy Garlic Breadsticks (4 Ingredients)
Ingredients
Method
- Preheat the oven to 350°F and line a baking sheet with parchment paper.
- In a medium bowl, combine the mozzarella, parmesan, egg, and garlic powder and mix until a thick, sticky mixture forms.
- Transfer the mixture to the prepared baking sheet and press it into a flat rectangle about 1/4 inch thick.
- Bake for 15 minutes, or until the cheese is melted, set, and lightly golden.
- Switch the oven to broil and move the baking sheet to the top rack.
- Broil for 2 minutes, or until the top is bubbly and golden brown, watching closely to prevent burning.
- Remove from the oven and let cool for 2 minutes, then slice into breadstick-style strips with a pizza cutter.
- Sprinkle with red pepper flakes and parsley or Italian seasoning, and serve warm with low-sugar marinara if desired.
Notes
- For crisper edges, spread the mixture slightly thinner and broil a bit longer, watching carefully.
- Store leftovers in an airtight container in the refrigerator for up to 4 days and reheat in an oven, toaster oven, or air fryer at 325–350°F until warmed through.
- Avoid reheating in the microwave if possible, as it can make the breadsticks soft and rubbery.
Greetings! Hope you’re having a good one.
Everyone deserves a chance to succeed. I’m offering private financial support for various projects and personal circumstances. Let’s talk on WhatsApp +79964497753
журнал про автомобили [url=https://avto-zhurnal-2.ru/]журнал про автомобили[/url] .
Visit https://calendaroftheday.com/ and you’ll find the Calendar of the Day! Find out everything interesting happening today, tomorrow, or throughout the year. And in the “Holidays” section, you’ll find interesting events for every day – from drinks and food to health and culture.
статьи об авто [url=https://avto-zhurnal-4.ru/]статьи об авто[/url] .
В этом информативном тексте представлены захватывающие события и факты, которые заставят вас задуматься. Мы обращаем внимание на важные моменты, которые часто остаются незамеченными, и предлагаем новые перспективы на привычные вещи. Подготовьтесь к тому, чтобы быть поглощенным увлекательными рассказами!
Где почитать поподробнее? – https://emiratescasino.uk/cluster-tumble-slots-explosion
1вин мегапей пополнение [url=www.1win48271.help]www.1win48271.help[/url]