

Freezing green beans is one of those simple kitchen tasks that saves time, money, and summer flavor—if done right. In this article, I’ll show you the best method for freezing green beans so they stay crisp, green, and fresh for months.
We’ll also break down blanching, sogginess issues, and how to store your beans so they actually taste good later. Whether you’re dealing with an overflowing garden or a big farmers’ market haul, this guide has you covered.
A Summer Harvest Story: My Journey into Freezing Green Beans
When I first started freezing green beans, I totally winged it. No blanching. No drying. I just tossed them into freezer bags, thinking, “How hard can it be?” Well, when I thawed them two months later, they were a soggy, sad mess. Lesson learned.
Now, it’s a whole different story in my kitchen. My method is easy, efficient, and results in vibrant green beans that actually snap when cooked. I use this same method after picking beans from my backyard garden or grabbing a big deal at the farmers’ market. And honestly? There’s something deeply satisfying about pulling a bag of your own preserved summer harvest out of the freezer in the middle of January.
If you’re looking to freeze your green beans the proper way, keep reading—because there’s a difference between “just freezing” and “freezing right.” And yes, the keyword here is freezing green beans—the right way.
I’ll walk you through every step, plus share why blanching matters, how to avoid sogginess, and how to keep that perfect texture. It’s simpler than you think—and the results are worth it.
I follow a similar method when freezing peaches, and it’s become a game changer for keeping produce at its peak. Green beans, peaches, even sour cherry sauce—it’s all about locking in flavor the smart way.
Picking and Prepping: The First Step to Freezing Green Beans
Choose the Freshest Green Beans Possible
The freezing process preserves what you start with—so make it good. Look for green beans that are:
- Bright green
- Smooth and firm
- Snappy when bent (no limp or rubbery feel)
If your green beans are already a little tired, freezing won’t improve them. Try using fresher beans or save the older ones for soups or stocks.
Once picked or bought, don’t wait. Ideally, you want to freeze green beans within 24 hours for peak flavor and nutrition.
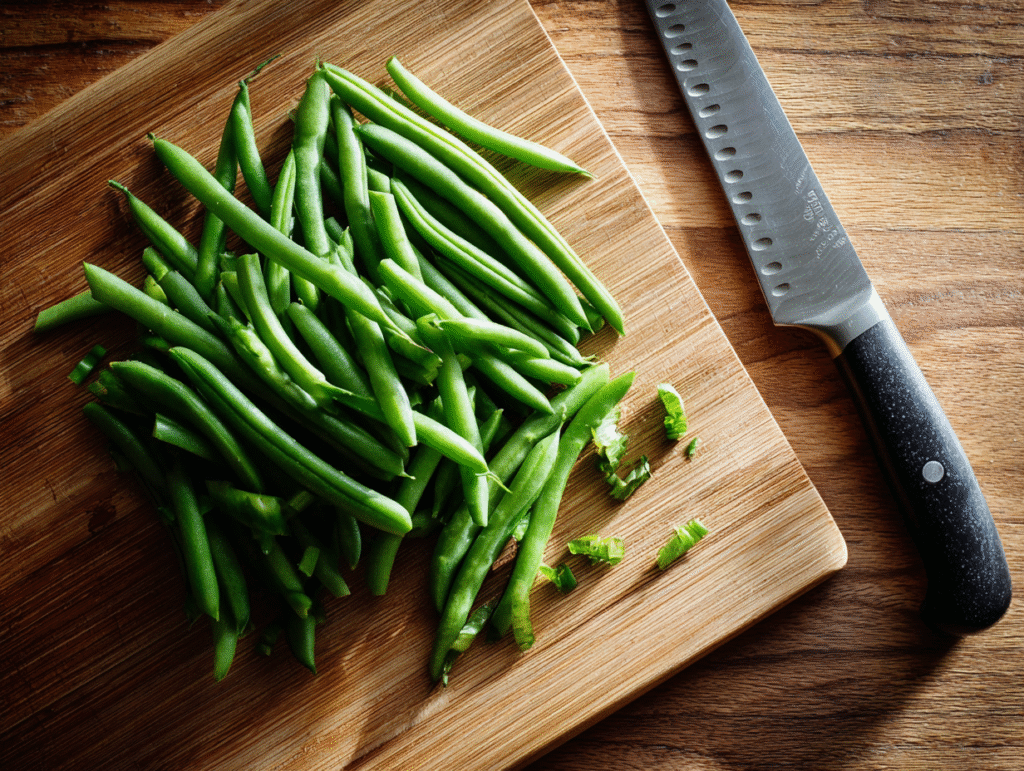
Trim, Wash, and Cut to Size
Start by trimming the ends. Some folks remove both tips, others just the stem end—it’s a personal preference. Wash thoroughly under cold water to remove any dirt or bugs hiding in those creases.
You can leave the beans whole, cut them in half, or chop into bite-sized pieces. Think ahead to how you’ll use them later—in stir-fries, casseroles, or soups.
If you’re into creative prepping ideas, this is the same logic I use when making wellness shots—always prep for purpose, not just storage.
The Secret to Perfect Green Beans: Blanch Before You Freeze
Why Blanching Matters (And What Happens If You Skip It)
Blanching isn’t just a fancy word for boiling. It’s a crucial step that locks in that beautiful green color and stops enzymes from breaking down the beans over time in the freezer.
Skipping this step? That’s how you end up with beans that are dull, mushy, or weirdly flavored after thawing. Blanching halts the natural aging process, kills bacteria, and helps the beans keep their texture. Think of it as setting the stage for freshness—even months down the line.
A quick tip: This same method works wonders when preserving seasonal fruit like in this fresh peach cobbler, where blanching the peaches makes peeling a breeze and keeps flavor locked in.
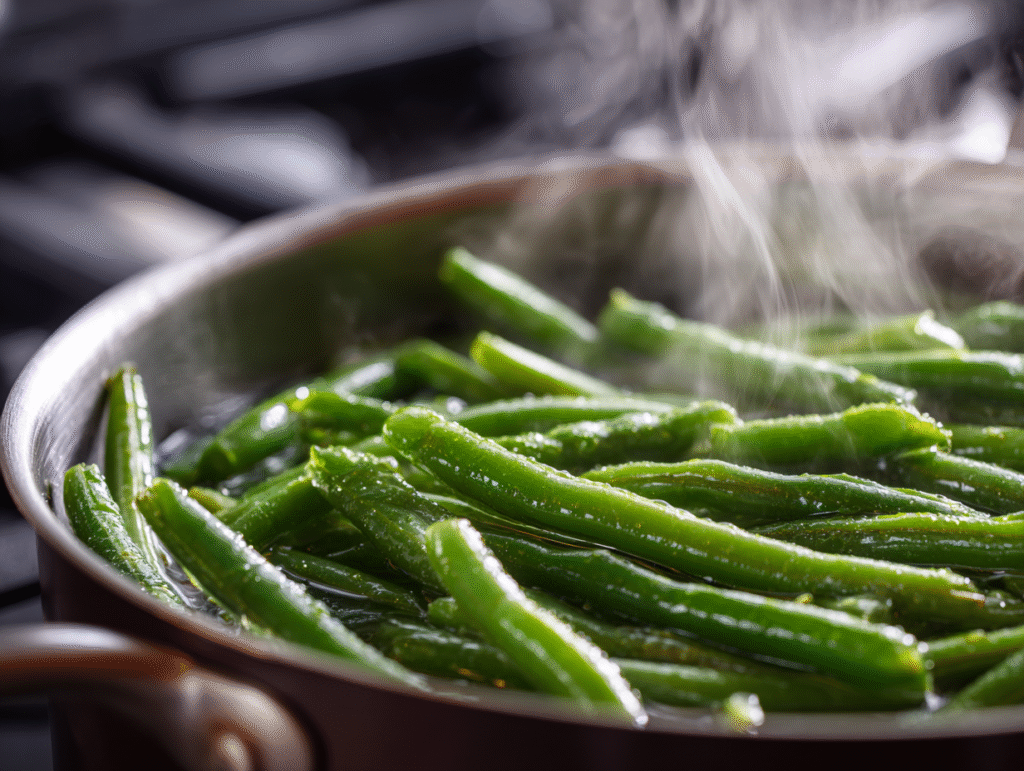
How to Blanch Green Beans Properly
Here’s your step-by-step for blanching green beans like a pro:
- Bring a large pot of water to a rolling boil.
- Drop your green beans in (1 lb at a time max).
- Boil for 2–3 minutes for whole beans, 1.5–2 minutes for cut beans.
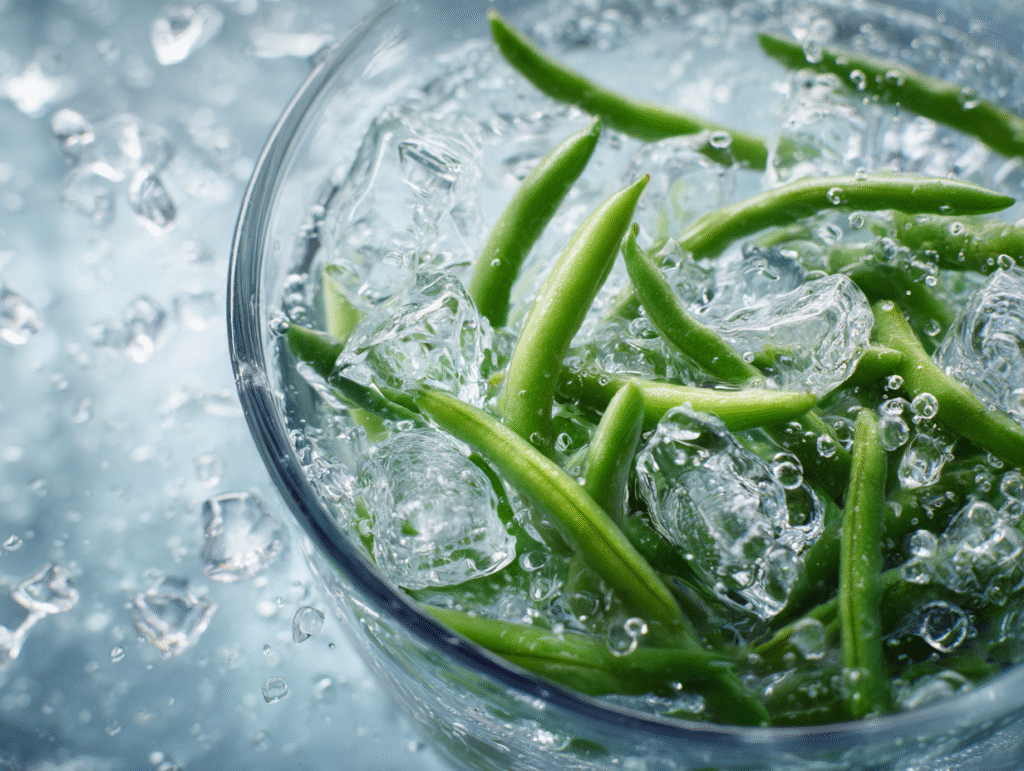
- Immediately transfer to an ice bath (a large bowl of water + ice) to stop the cooking.
- Let them cool for the same amount of time they boiled.
You’ll notice the beans turn a brighter green in the pot—that’s your signal that things are working.
Once cooled, pat them completely dry using clean kitchen towels or a salad spinner. Moisture is the enemy of quality freezing. Extra water = freezer burn = soggy green beans later.
Just like I do when making ice water hacks for ultra-cold drinks, the ice bath here is what keeps your green beans from cooking too long. Simple science, big results.
Pack It Right: Storing and Freezing Green Beans Like a Pro
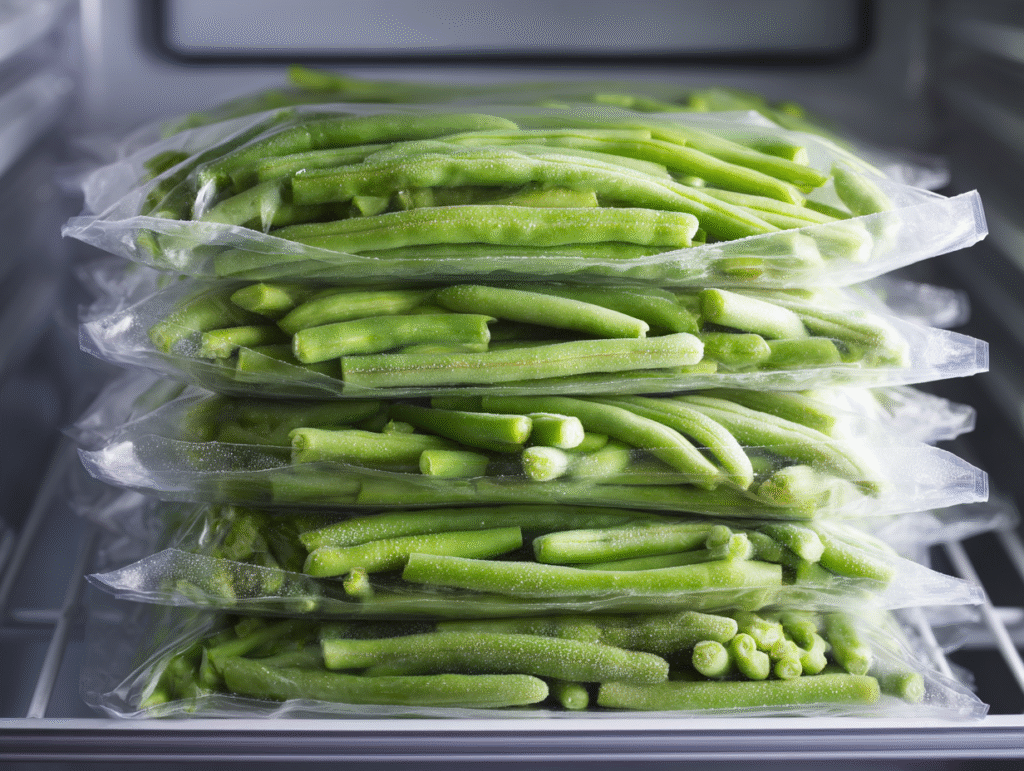
Dry, Pack, and Label—The Golden Rules
Once your green beans are blanched and fully dry, it’s time to pack. Moisture is your biggest enemy here—it causes ice crystals that ruin texture and flavor.
Here’s how to get it right:
- Use freezer-safe bags or containers. Vacuum-sealed bags are best, but zip-top freezer bags work great too.
- Squeeze out as much air as possible before sealing to prevent freezer burn.
- Lay bags flat while freezing—this saves space and helps them freeze faster.
- Label your bags with the date and quantity.
Properly packed green beans can last up to 12 months in the freezer while keeping their quality. After that, they’re still safe to eat—but taste and texture may decline.
It’s the same method I use for storing leftovers from frozen s’mores. Flat-packing isn’t just tidy—it’s strategic. You’ll thank yourself later.
Preventing Soggy Beans After Freezing
Soggy beans usually come from one of two culprits: leftover moisture or incorrect cooking after thawing. To avoid this:
- Don’t overcook after thawing—go for sautéing, roasting, or tossing straight into soups.
- Don’t refreeze after thawing. Use what you need, and keep the rest frozen.
I’ve also found that thawing directly in a hot pan (no water involved) keeps green beans firmer. The heat revives that snap—kind of like giving them a second life.
For inspiration on how to use them post-freeze, I treat them like the fresh add-in I’d toss into chilled summer watermelon popsicles—simple, bright, and full of contrast.
Freezing Green Beans FAQs: Everything You Need to Know
What is the proper way to freeze fresh green beans?
Blanching is key. Trim and wash your green beans, then boil for 2–3 minutes, cool in an ice bath, dry thoroughly, and pack in airtight freezer-safe bags. Label and lay flat for efficient storage.
What happens if you don’t blanch greens before freezing?
Skipping blanching can lead to dull color, mushy texture, and a weird taste. Enzymes in the beans continue to break down even in the freezer, so they won’t hold up as well over time.
Why are my green beans soggy after freezing?
The biggest culprit is leftover moisture. Make sure your beans are completely dry before freezing, and avoid overcooking when you reheat them. Try sautéing instead of boiling after thawing.
Are green beans good after being frozen?
Absolutely—if frozen properly. They retain flavor, color, and nutrients when blanched and packed well. I often toss frozen green beans straight into soups or roast them for a quick side.
Is it better to freeze greens raw or cooked?
Freezing them raw shortens their shelf life and leads to sogginess. Blanched greens freeze better. However, fully cooked green beans can be frozen too—just make sure they’re cooled and drained well.
How long do you blanch green beans?
Whole beans need 2–3 minutes. Cut beans can be blanched for 1.5–2 minutes. Use a timer—it’s easy to overdo it. Cool them in an ice bath for the same time afterward.
What is the best way to preserve green beans?
Freezing is one of the best ways, especially if you follow the blanching method. It keeps them nutritious, fresh-tasting, and versatile for months. Canning is another method, but freezing is faster and easier for small batches.
For other great preservation tips, check out how I prep natural Mounjaro drinks or chill ingredients for fresh recipes like the ice water hack—the goal is always to keep things clean, crisp, and efficient.
Conclusion: Your Green Bean Freezer Game, Upgraded
Freezing green beans is simple once you know what to avoid—and what steps really matter. It all starts with fresh beans, a quick blanch, and careful packing. Skip those, and you’ll end up with limp, soggy veggies. But do it right? You’ll have crisp, bright green beans on hand for soups, pastas, stir-fries, and more—all year long.
So, next time you’re staring down a surplus of green beans at the market or from your garden, don’t let them go to waste. You’ve got the tools now. Grab a pot, get blanching, and give your freezer something to be proud of.
Print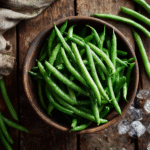
How to Freeze Green Beans the Right Way (No Soggy Messes!)
- Total Time: 15 minutes
- Yield: 4 servings 1x
- Diet: Vegan
Description
How to freeze green beans properly using blanching for perfect texture and flavor all year round.
Ingredients
1–2 pounds fresh green beans
Large pot of boiling water
Large bowl of ice water
Freezer-safe bags or containers
Towels or salad spinner for drying
Instructions
1. Trim ends of green beans and rinse well.
2. Bring water to a boil in a large pot.
3. Add green beans and boil for 2–3 minutes.
4. Transfer immediately to ice water bath to cool for same amount of time.
5. Remove and dry green beans thoroughly.
6. Pack into freezer-safe bags, remove air, and label.
7. Lay flat in freezer for best storage.
Notes
Make sure green beans are fully dry before packing to avoid freezer burn.
You can freeze them whole or cut into smaller pieces.
Blanched green beans will last up to 12 months in the freezer.
- Prep Time: 10 minutes
- Cook Time: 3 minutes
- Category: Preserving
- Method: Freezing
- Cuisine: American
Nutrition
- Serving Size: 1 cup
- Calories: 35
- Sugar: 2g
- Sodium: 2mg
- Fat: 0g
- Saturated Fat: 0g
- Unsaturated Fat: 0g
- Trans Fat: 0g
- Carbohydrates: 8g
- Fiber: 3g
- Protein: 2g
- Cholesterol: 0mg
This web site really has all of the information and facts I wanted concerning this subject and didn’t
know who to ask.